Loop
Step 1: Navigate to the Dataflow Page
Navigate to the Dataflow Page by following these steps.
Step 2: Locate the Dataflow Container
Identify the dataflow container that is connected to the event box with a purple border. This container represents the flow of data associated with the event.
Step 3: Add a Dataflow Pattern
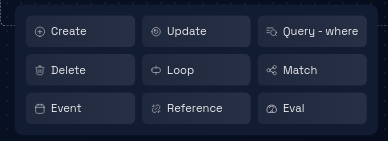
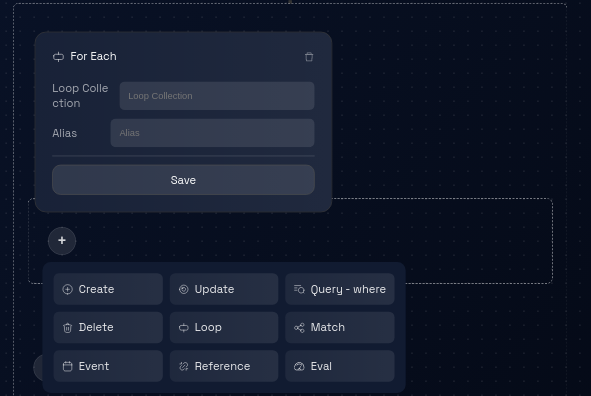
Inside the identified dataflow container, find the "+" button. Clicking on this button will open a menu with options for adding a dataflow pattern. Click on the "+" button to open the menu.

Step 4: Select a Dataflow Pattern
In the menu that opens, you'll see a list of available dataflow patterns. Choose the appropriate dataflow pattern you want to add in this case Loop.

Step 5: Enter Edit Mode
By default, the dataflow pattern will be in preview mode. To make changes to the dataflow pattern, locate the "edit" icon, usually positioned at the header of the dataflow badge. Click on the "edit" icon to enter edit mode for the dataflow pattern.
Step 6: Configure Loop Collection and Alias
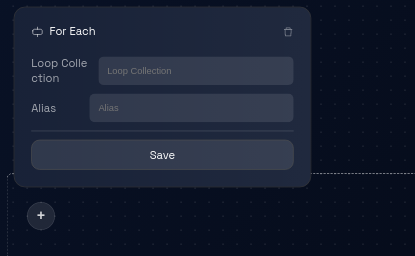
Inside the edit mode interface, configure the dataflow pattern:
Add Loop Collection Value: Optionally, you can add the Loop Collection value, which might refer to a collection of items within the dataflow.
Assign Alias (Optional): Optionally, assign an alias value to the dataflow pattern for easier reference.

Step 7: Add Dataflow Pattern (Loop Dataflow)
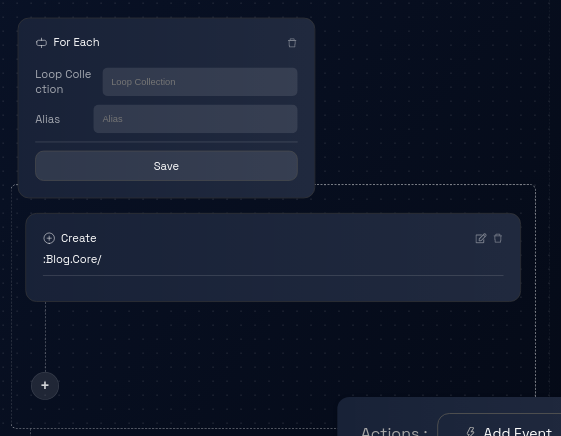
To add a Loop Dataflow pattern, click on the "+" button within the edit mode interface. This action will add the Loop Dataflow pattern to the dataflow container.


Step 8: Delete Dataflow Pattern (Loop Dataflow)
To delete a Loop Dataflow pattern, locate the "trash" icon associated with the pattern. This icon is typically positioned near the Loop Dataflow pattern.
Click on the "trash" icon to delete the Loop Dataflow pattern.
Step 9: Save the Dataflow Pattern
After configuring Loop Collection, alias, adding or deleting Loop Dataflow patterns, locate the "Save" button within the edit mode interface.
Click on the "Save" button to apply the changes you've made to the dataflow pattern.
Step 10: Dataflow Pattern Update
The platform will process your changes and update the dataflow pattern according to your configurations.
The processing time may vary based on the complexity of the dataflow pattern and the platform's performance.
Step 11: Review and Continue
Review the data model to ensure that the dataflow pattern has been updated as per your configurations. You can proceed with other actions, such as editing other dataflow patterns, entities, or attributes.