Creating a Blank Model: Step-by-Step Guide
Step 1: Click on "New Model"
In the Design Studio dashboard, locate and click on the "New Model" button.

Step 2: Fill in the Model Information
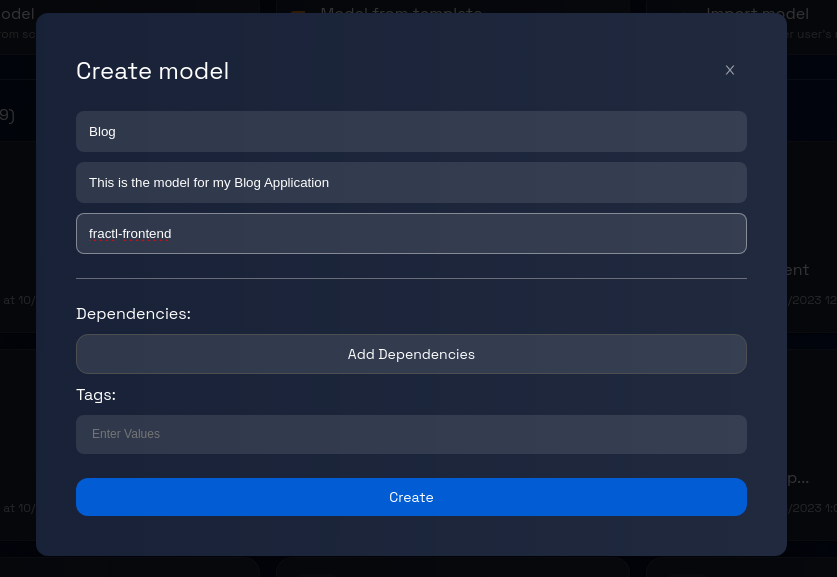
Clicking on "New Model" will present you with a dialogue box with fields to fill in the following information about the model:
- Name: A unique name for your model. The name should start with an alphabet and should contains only alpha-numeric characters.
- Description: A brief description of the application.
- GitHub Organization: The name of the GitHub organization where the code for the model will be stored.

Step 3: Create the Model
Once you have verified the entered information, click the "Create" button at the bottom of the dialogue box. Now Design Studio will initiate the process of creating a blank model based on the provided information. This process might take a moment, so please be patient. Once the model creation process is complete, you will see the model card appearing on the dashboard.

Step 4: Start Modelling the Application!
At this point, you have successfully created a blank model. You can double-click the model-card to define new components.