Add an Attribute
Step 1: Navigate to the Dataflow Page
Navigate to the Dataflow Page, and follow these steps.
Step 5: Add an Attribute
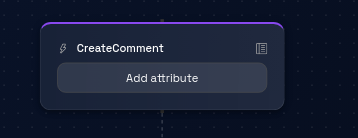
Inside the event box, look for the "Add Attribute" button. This button is used to initiate the process of adding a new attribute to the event.
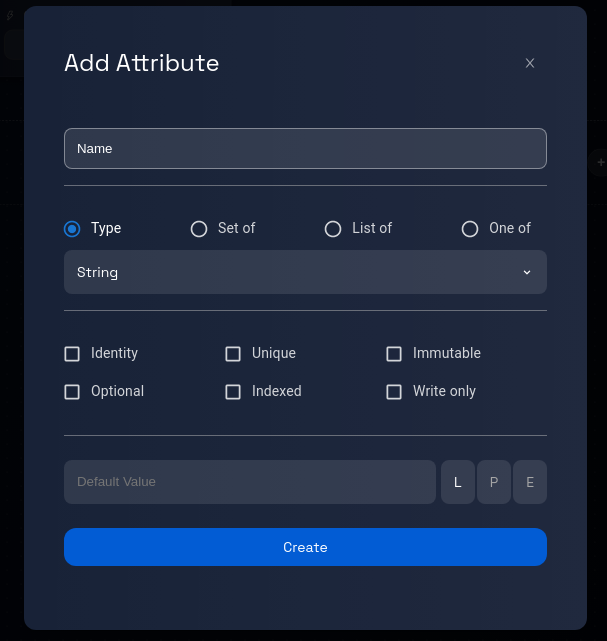
Click on the "Add Attribute" button to open a dialogue box.

Step 6: Enter Attribute Details
In the dialogue box, you'll be prompted to provide the following information:
- Attribute Name: Enter a descriptive name for the attribute you want to add to the event.
- Attribute Type: Select the appropriate type for the attribute from a list of available data types (e.g., text, number, date, etc.).

Step 7: Assign Identifier and Default Value (Optional)
Depending on your needs, you might have additional options to consider:
- Default Value: You can also assign an optional default value to the attribute, which is used when no specific value is provided.
Step 8: Review and Verify
Take a moment to review the attribute name, type, and default value (if applicable).
Step 9: Click "Create"
Locate the "Create" button within the dialogue box and click on it.
Step 10: Attribute Addition Process
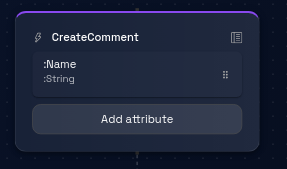
After clicking "Create," Design Studio will process your request and add the new attribute to the selected event.
Step 11: Confirmation and Completion
Upon successful attribute addition, you will receive a confirmation message indicating that the attribute has been added to the event.

Step 12: Review and Continue
Review the model to ensure that the new attribute has been successfully added to the event. You can now proceed with other actions, such as adding more attributes or working on other parts of the model.
Congratulations! You've successfully learned how to add an attribute to an event.